

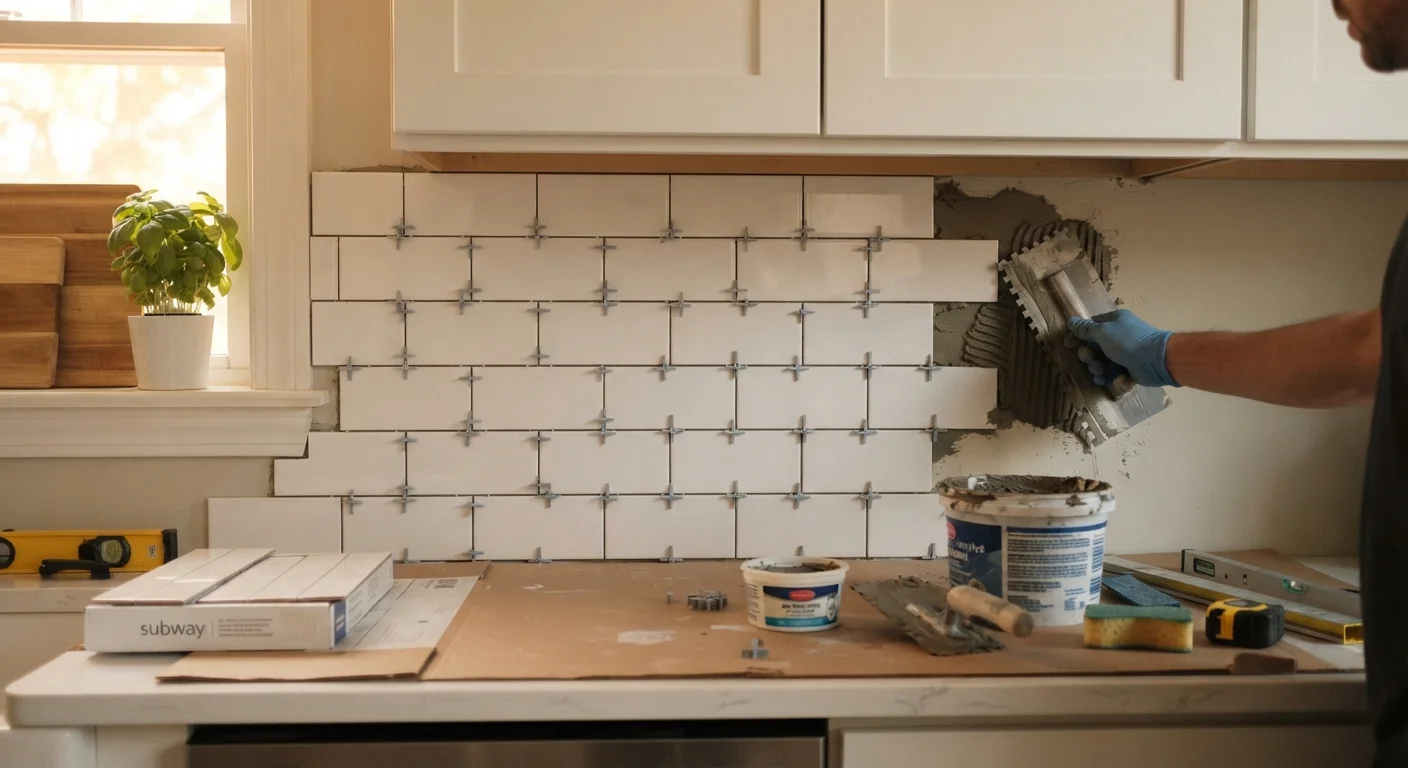
What Most Tutorials Leave Out
A backsplash is one of the most impactful upgrades you can make to a kitchen - it adds color, texture, and a finished look without requiring demolition or a contractor. But most how-to videos jump straight to the fun part: pressing tile into wet adhesive. What they skip is everything that happens before and after that moment, and those gaps are exactly where first-timers run into trouble.
If you're approaching your first home improvement project like this one, see our step-by-step first project guide for a grounded overview of planning, tools, and safety before diving in. This article focuses specifically on the overlooked details that separate a backsplash that looks great for years from one that chips, shifts, or gaps within months.
What you will need
Planning Layout Before You Touch Adhesive
The single most skipped step in backsplash installation is the dry layout - arranging your tiles on the counter (without adhesive) to visualize the full pattern before committing. This lets you spot problems: a row of slivers at the edges, a grout line that lands awkwardly behind the faucet, or a pattern that doesn't center well.
Start by finding the visual center of your backsplash area - usually centered on the range or sink - and work outward in both directions. Mark a level horizontal line using a spirit level as your first-row guide. Tile that starts even slightly off-level will look increasingly wrong as rows stack upward.
Center Your Layout on the Focal Point
If your kitchen has a range hood or a decorative tile inset, center the layout on that element rather than splitting the wall in half. This creates visual balance that feels intentional rather than accidental. A few minutes of dry-layout planning prevents a tile pattern that looks off-center once everything is set permanently.
Pay close attention to outlets and switch plates. Tiles must be cut around them cleanly, and outlet boxes may need extension rings if your tile thickness pushes them beyond the wall plane - a detail most tutorials omit entirely.
Surface Prep: The Step That Makes or Breaks Adhesion
Backsplash tiles are typically applied directly to drywall (or, in older homes, plaster). Either surface must be clean, dry, and free of grease before adhesive goes on. Kitchen walls accumulate cooking grease that is invisible to the eye but devastating to tile adhesion. Wash the area thoroughly with a TSP (trisodium phosphate) substitute cleaner, rinse, and allow it to dry completely.
If the wall has been painted with a high-gloss finish, scuff it lightly with 100-grit sandpaper so the adhesive has something to grip. Don't skip this - glossy paint is one of the most common reasons tiles eventually pop off. Remove all outlet covers and tape off the countertop and any painted surfaces that border the work area.
Wet Tile Saw
Cuts ceramic, porcelain, or stone tile cleanly and accurately, especially around outlets and edges.
Notched Trowel
Spreads adhesive with the ridged texture needed for proper tile bonding.
Rubber Grout Float
Presses grout into tile joints evenly without scratching the tile surface.
Spirit Level
Ensures the first row of tile is perfectly horizontal, preventing a crooked finished look.
Plastic Tile Spacers
Maintains uniform grout joint width across all tiles during installation.
Metal Edge Trim (Schluter Strip)
Finishes exposed tile edges cleanly and protects them from chipping.
Caulk Gun
Applies a controlled bead of silicone caulk along the countertop-to-backsplash joint.
Grout Sealer
Applied after grout cures to protect against staining from kitchen grease and liquids.
Setting Tile and Handling Edges
Use a notched trowel to spread tile adhesive (thin-set mortar or mastic, depending on your tile type - check the manufacturer's guidance) in small sections. Work in areas of about 2-3 square feet at a time so the adhesive doesn't skin over before tiles are pressed in. Press each tile firmly with a slight twist to ensure full contact, and use plastic spacers to maintain consistent grout joints.
Don't Skip the Edge Trim
Raw tile edges along open walls or cabinet ends are one of the most common signs of a rushed DIY backsplash. Metal edge trim strips, set into the adhesive before your final tile row is placed, finish those borders cleanly and prevent chipping. They're available in a range of finishes to match kitchen hardware and are easy to cut with tin snips or a miter saw.
The edges of your backsplash - where tile meets an open wall, a window casing, or a cabinet end panel - need a finished treatment. Tile edge trim strips (often called schluter strips or metal edge trim) are pressed into the adhesive along the last tile row before grouting. They create a clean, professional border and protect the tile edge from chipping. Without them, a raw tile edge looks unfinished and is prone to damage.
When all tiles are set, allow the adhesive to cure fully - typically 24 hours - before grouting. Rushing this step can shift tiles or weaken the bond.
Grouting and the Caulk Line Everyone Gets Wrong
Mix unsanded grout for joints under 1/8 inch wide, and sanded grout for wider joints. Work the grout diagonally across the tiles using a rubber grout float, pressing it firmly into the joints. After a short wait (follow the grout manufacturer's timing), wipe the tile faces with a damp sponge in circular motions, rinsing frequently. A grout haze will remain - buff it off with a clean dry cloth once the grout firms up.
Here is the detail most tutorials omit: do not grout the joint where the backsplash meets the countertop. That joint needs to flex slightly as the counter expands and contracts with temperature changes. Grout will crack there. Instead, apply a bead of color-matched silicone caulk along that seam after grouting. For more on how grout and caulk work together in wet areas, see our guide on grout, caulk, and tile maintenance.
Allow grout to cure for the time specified on the package before wiping down the backsplash or exposing it to water. Sealing the grout after it cures fully - particularly for light-colored grout - helps resist staining from cooking splatter.
The content on this site is provided for informational purposes only and should not be considered a substitute for professional advice. While we strive to provide accurate and up-to-date information, we make no guarantees regarding its completeness or accuracy. Always consult a qualified professional for advice specific to your circumstances before making any decisions.