

Why Fluid Checks Matter More Than Most Drivers Realize
Modern vehicles rely on a network of fluids to protect metal components from heat and friction, transmit hydraulic force, and maintain safe handling. When any one of these fluids drops below the required level or degrades in quality, the consequences range from accelerated component wear to safety-critical failures - particularly with brakes and cooling systems.
The good news is that basic fluid checks are among the easiest maintenance tasks any driver can perform at home. They require no specialized tools, cost nothing but a few minutes, and can surface warning signs long before a dashboard light appears. For a broader understanding of what these systems actually do, see our plain-language guide to vehicle systems.
If you're new to vehicle ownership, this walkthrough pairs well with car maintenance essentials for new drivers - a grounded starting point for building confidence under the hood.
Owner's Manual
Specifies correct fluid types, dipstick locations, and check intervals unique to your vehicle.
Lint-Free Rags or Paper Towels
Used to wipe dipsticks clean before and after reading levels accurately.
Flashlight or Work Light
Improves visibility inside a dark engine bay, especially for reservoir markings.
Nitrile Gloves
Protects skin from engine oil, coolant, and brake fluid, all of which can be irritants.
How to Check Your Vehicle's Key Fluids
The five fluids covered here - engine oil, coolant, brake fluid, power steering fluid, and windshield washer fluid - represent the routine checks most drivers can perform safely at home. Transmission fluid and differential fluid exist in many vehicles as well, but checking those often requires different procedures or a lift, and is generally best handled during a scheduled service visit.
What you will need
Park on level ground and prepare the engine
Pull onto a flat, level surface and turn off the engine. For engine oil, wait at least five minutes after shutting down so oil drains back into the pan and gives an accurate reading. For coolant, never open the reservoir or radiator cap on a hot engine - allow the vehicle to cool for at least 30 minutes. Other fluid reservoirs can generally be checked anytime the engine is off.
Check the engine oil level and condition
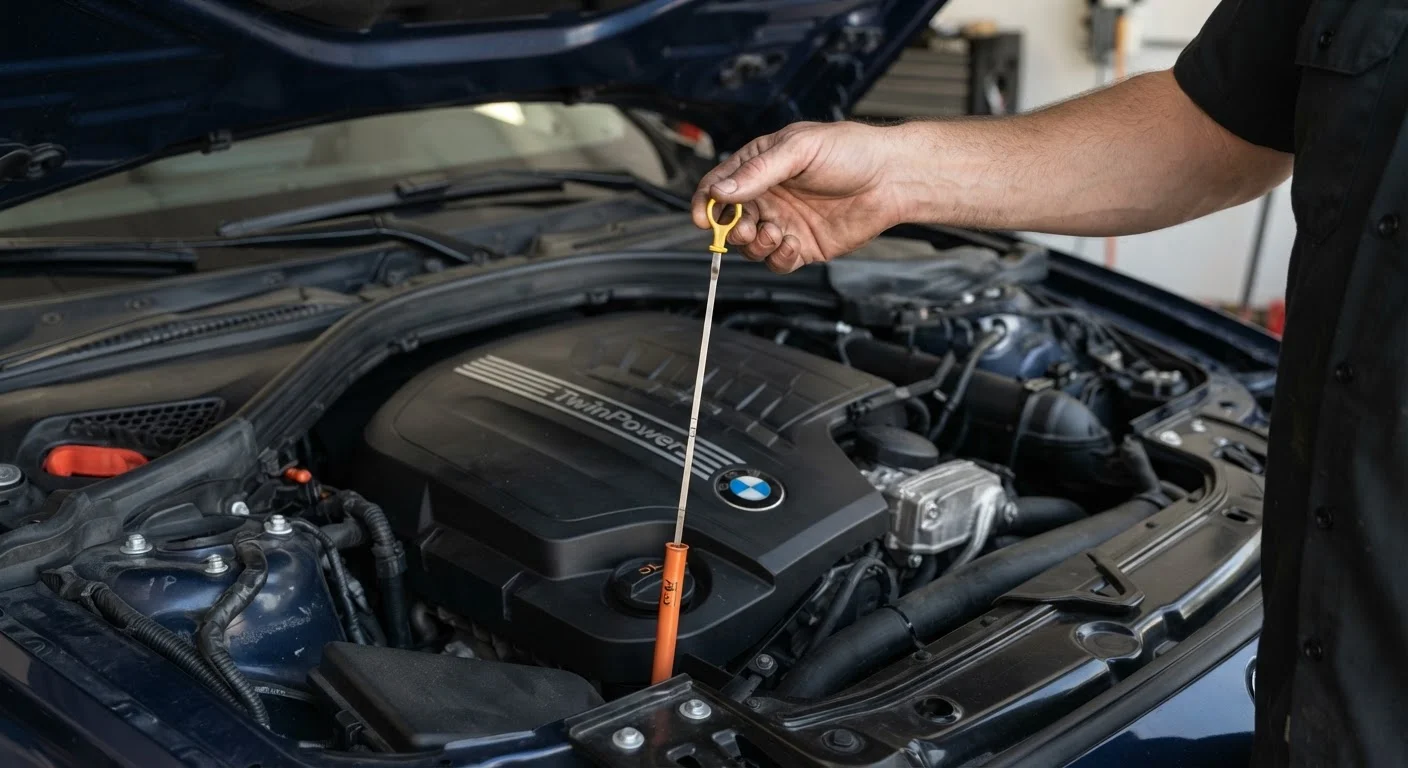
Locate the oil dipstick - typically a brightly colored loop or handle near the front of the engine. Pull it out, wipe it clean with a rag, reinsert it fully, then withdraw it again. The oil level should fall between the two marks (often labeled MIN and MAX or indicated by cross-hatching). Observe the oil's color: honey-brown to dark brown is normal; black sludge or a milky, frothy appearance suggests a problem requiring mechanic attention.
Inspect the coolant (antifreeze) level
Locate the coolant overflow reservoir - a translucent plastic tank connected to the radiator by a hose. With the engine cold, check that the fluid sits between the LOW and FULL marks on the side of the tank. Coolant is typically bright green, orange, or pink depending on the formula; a brownish or rusty color signals contamination. Do not remove the radiator cap directly unless you are certain the engine is completely cold and you understand the pressure risks involved.
Check brake fluid level and color
The brake fluid reservoir is a small translucent plastic container, usually located near the firewall on the driver's side of the engine bay. The fluid level should be between MIN and MAX. Brake fluid is naturally pale yellow; dark brown fluid indicates it has absorbed moisture and degraded, which compromises braking performance. Do not open the reservoir unless necessary, as brake fluid absorbs moisture from the air rapidly.
Check power steering and windshield washer fluid
If your vehicle has hydraulic power steering (many newer vehicles use electric power steering with no fluid reservoir), find the reservoir - often labeled with a steering wheel icon - and confirm the fluid is within range. For windshield washer fluid, simply fill to the brim with a premixed washer solution rated for your climate. Never substitute plain water in freezing conditions, as it will expand and crack the reservoir.
Make Fluid Checks Part of a Routine
Pairing fluid checks with a regular habit - such as a monthly calendar reminder or each fuel fill-up - ensures problems are caught early. Consistent monitoring also helps you notice trends, like oil that burns off faster than expected, which can indicate a developing mechanical issue worth discussing with a mechanic.
Know When to Stop and Call a Professional
Fluid checks are diagnostic, not always repair tasks. If you find a significant leak, heavily contaminated fluid, or a level that drops quickly after topping off, stop and schedule a mechanic visit. Continuing to drive with compromised brake fluid or severely low coolant can result in brake failure or engine overheating - neither should be deferred.
Never Mix Incompatible Fluids
Using the wrong coolant type or mixing different brake fluid grades can cause chemical reactions that degrade seals, corrode components, and compromise safety systems. Always confirm the specification listed in your owner's manual before adding any fluid. When in doubt, consult a qualified mechanic rather than guessing.
Reading the Results and Knowing Your Next Step
A fluid check is only useful if you act on what you find. Low fluid that you top off using the correct product is a straightforward fix. But fluid that is consistently low, discolored, or contaminated signals an underlying problem that needs professional diagnosis.
Before heading to a shop, it helps to document what you observed - which fluid, what level, and what color. That information makes mechanic visits more efficient. Our pre-shop preparation checklist walks you through how to communicate symptoms clearly and ask the right questions.
You may also want to combine fluid checks with a quick exterior walkthrough before long trips. The pre-trip walkaround guide covers what to look for beyond the engine bay, including visible leaks underneath the vehicle that can confirm a fluid problem you spotted inside the hood.
It's also worth knowing that some common beliefs about fluid maintenance - like the idea that oil must always look dark to need changing - aren't accurate. See car maintenance myths that keep costing drivers money to separate fact from long-held fiction.
The content on this site is provided for informational purposes only and should not be considered a substitute for professional advice. While we strive to provide accurate and up-to-date information, we make no guarantees regarding its completeness or accuracy. Always consult a qualified professional for advice specific to your circumstances before making any decisions.